 Save to Pinterest
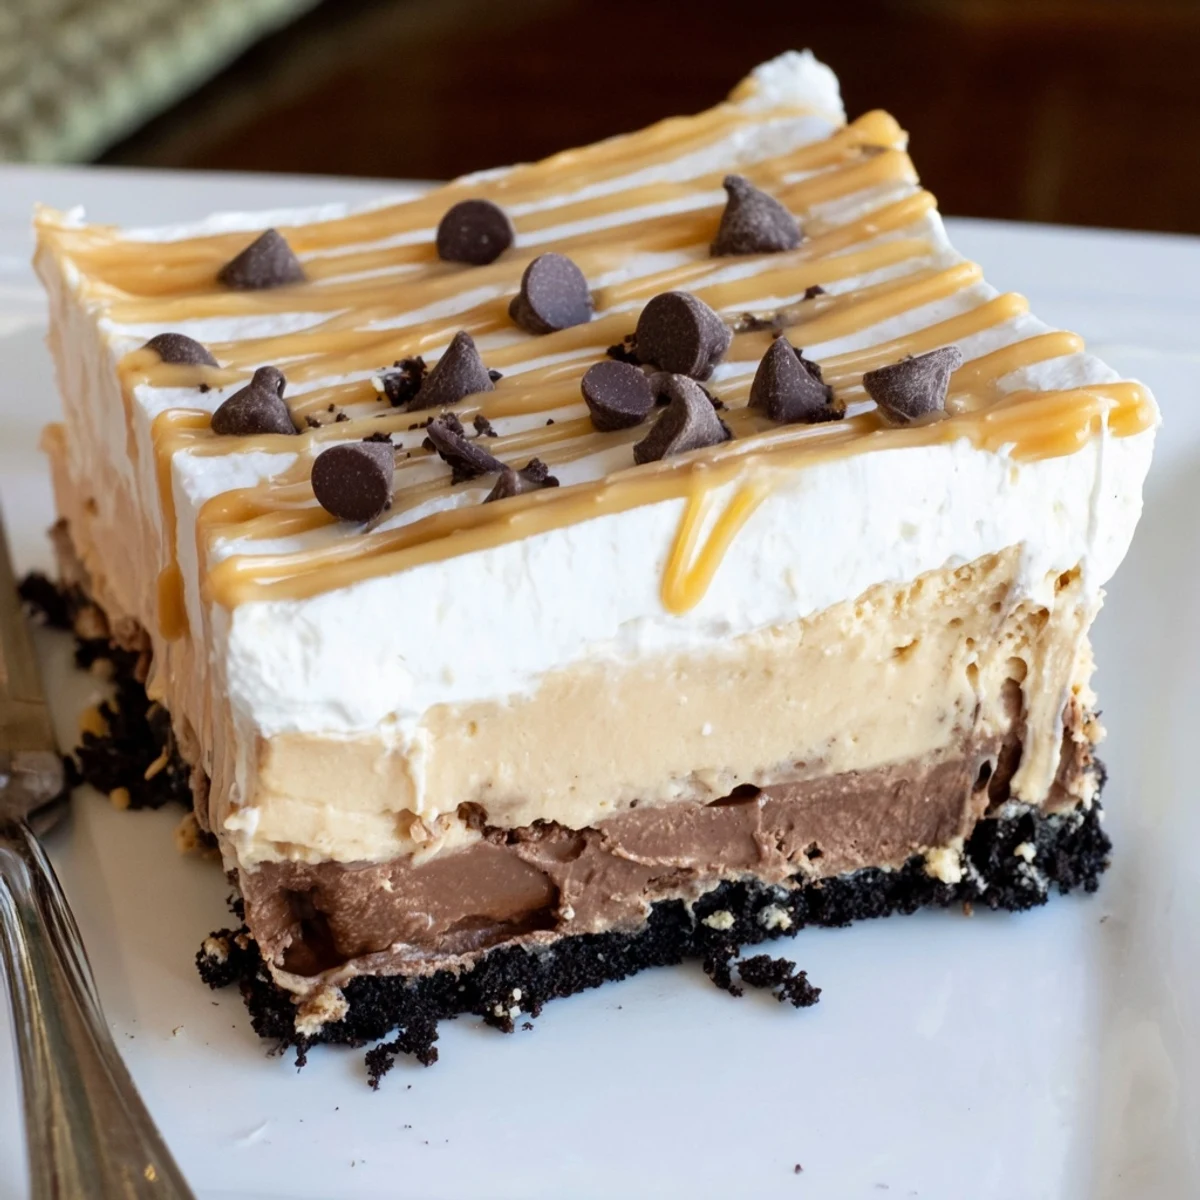
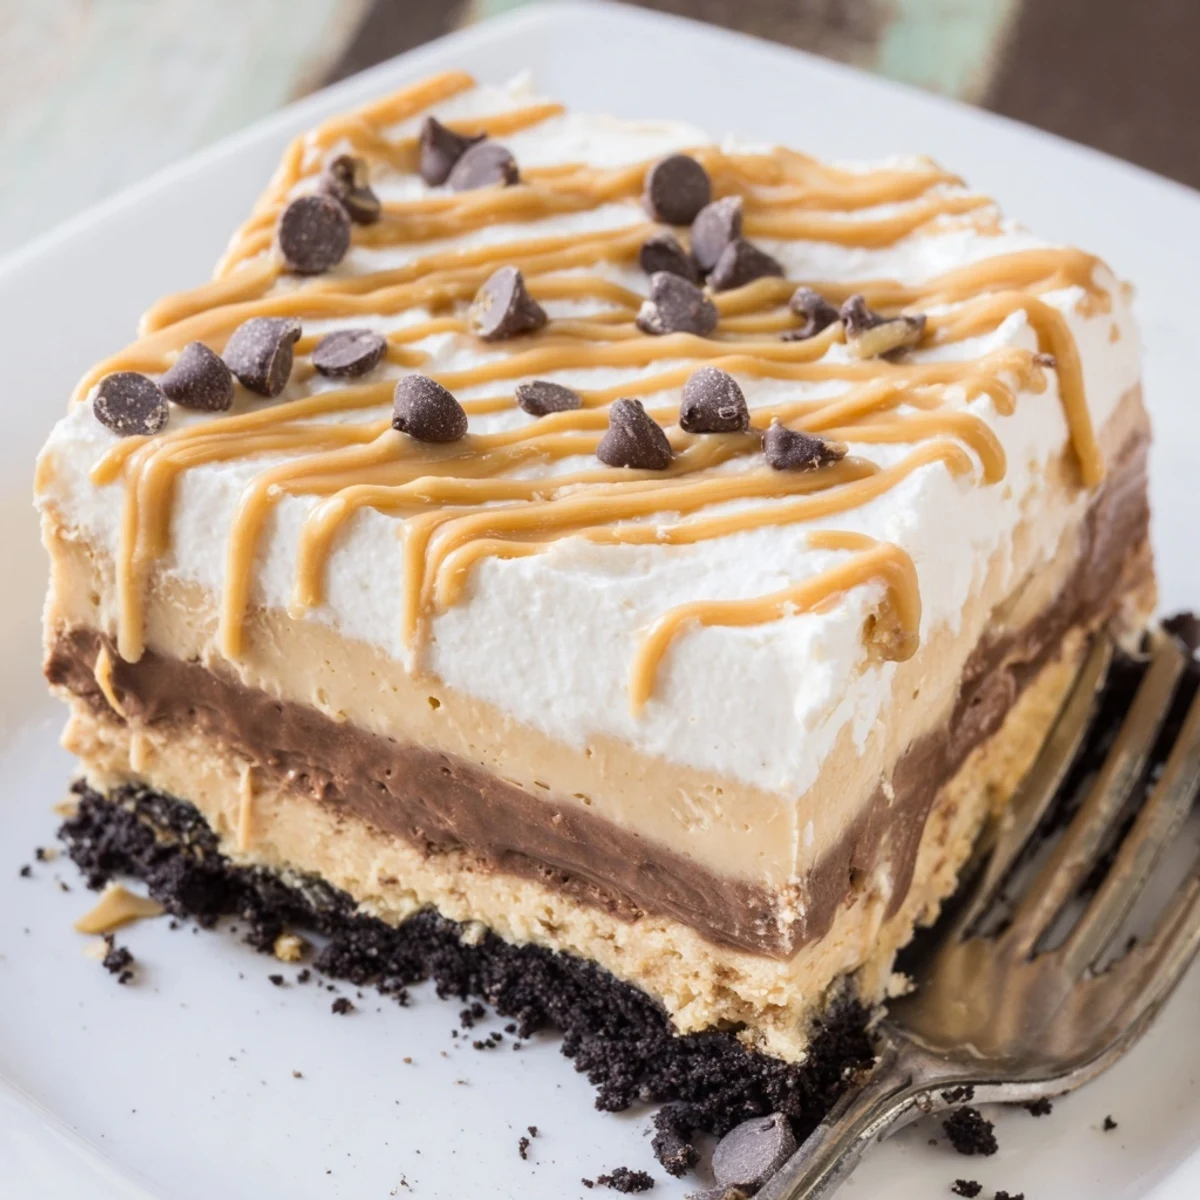
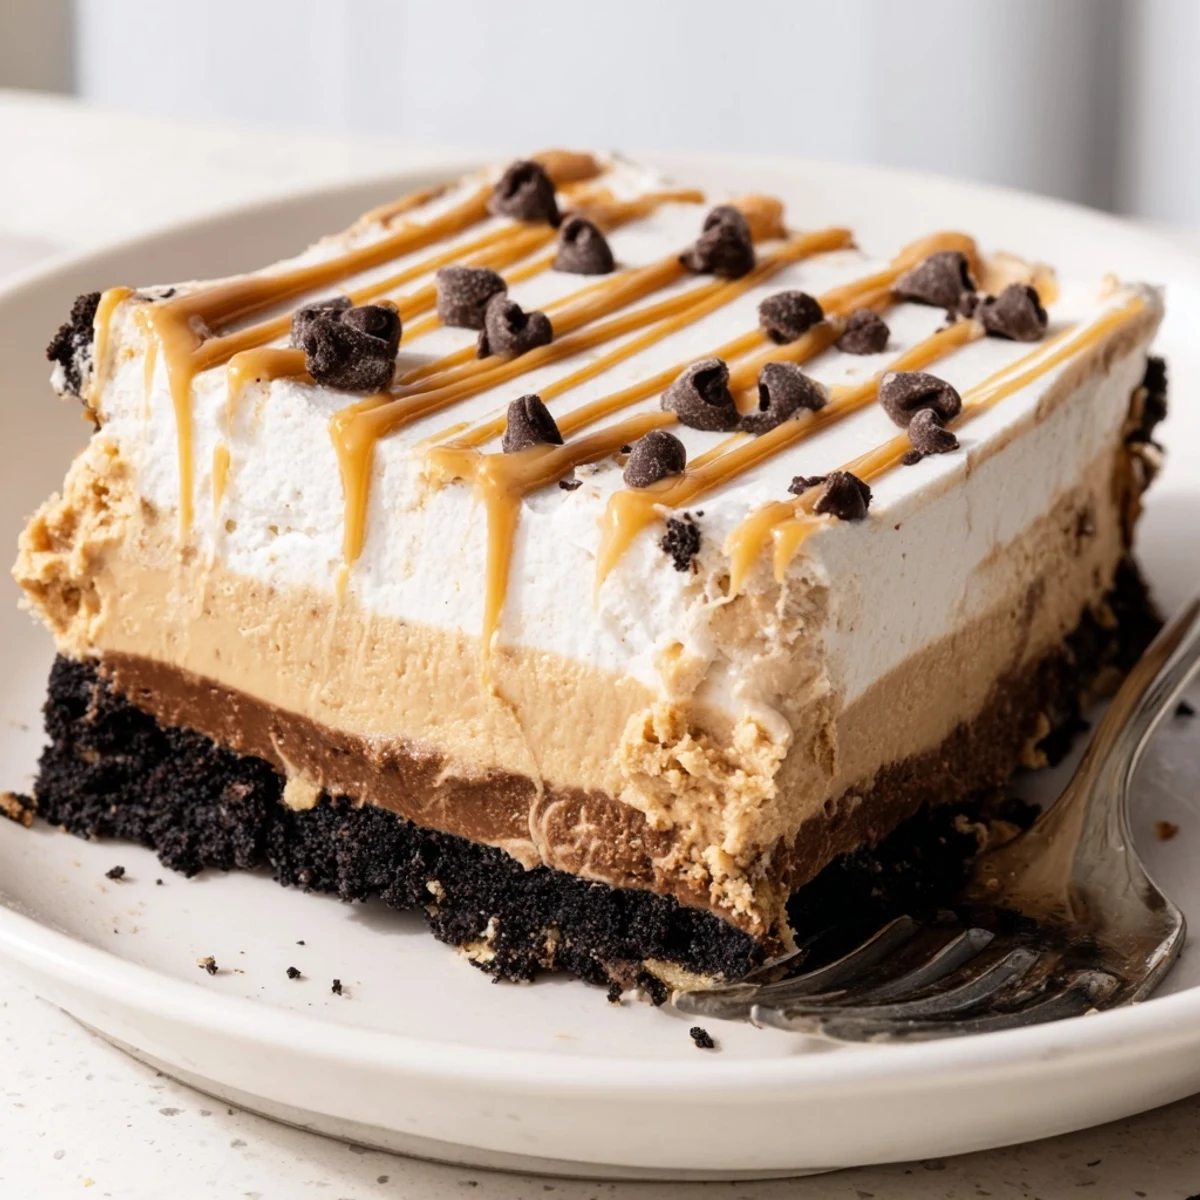
 This no-bake peanut butter layered delight is a showstopper dessert that requires just 25 minutes of prep time. A buttery chocolate cookie crust forms the base, topped with a velvety cream cheese and peanut butter mousse, followed by a rich chocolate pudding layer, and finished with fluffy whipped topping.
After chilling for at least 3 hours, the layers set into perfect, sliceable squares that reveal a beautiful cross-section of flavors and textures. It's an ideal make-ahead dessert for gatherings, potlucks, or whenever you're craving something sweet and indulgent without turning on the oven.
My sister called at 10pm on a Tuesday demanding something sweet, something peanut butter, and something that did not require turning on the oven in her sweltering apartment.
I brought this to a potluck where three people asked for the recipe before they even finished their first bite, and one friend literally scraped the corner of the dish clean when nobody was looking.
Ingredients
- 200 g chocolate sandwich cookies, crushed: The darker the cookie, the better the crust holds together and tastes.
- 75 g unsalted butter, melted: This binds the crumbs into something that actually slices cleanly instead of crumbling everywhere.
- 225 g cream cheese, softened: Let it sit out for an hour so you do not get lumps in your peanut butter layer.
- 120 g creamy peanut butter: Use a standard commercial brand here, as natural styles can separate and make the layer grainy.
- 100 g powdered sugar: Sweetens the cream cheese mixture without adding any gritty texture.
- 480 ml whipped topping total, divided: Half gets folded into the peanut butter filling and half crowns the whole dessert like a cloud.
- 1 package instant chocolate pudding mix (100 g): The instant variety sets quickly and gives you that deep cocoa flavor without cooking.
- 375 ml cold milk: Whole milk makes the richest pudding, but any milk works in a pinch.
- 2 tbsp peanut butter, melted (optional): A warm drizzle on top makes it look bakery level with almost zero effort.
- Chocolate shavings or mini chips (optional): For anyone who believes there is no such thing as too much chocolate.
Instructions
- Build the crust:
- Toss the crushed cookies with melted butter until every crumb glistens, then press the mixture firmly and evenly into your baking dish using the back of a spoon or the flat bottom of a glass.
- Whip up the peanut butter layer:
- Beat the cream cheese, peanut butter, and powdered sugar until completely smooth with no streaks, then gently fold in 240 ml of whipped topping so you keep all that airiness intact.
- Spread and stack:
- Spread the peanut butter mixture over your chilled crust in an even layer, smoothing the top so the pudding has a flat surface to rest on.
- Mix the chocolate pudding:
- Whisk the pudding mix and cold milk together for about two minutes until it thickens noticeably, then pour it over the peanut butter layer and spread it out gently.
- Crown and garnish:
- Spread the remaining whipped topping over the pudding, then drizzle with melted peanut butter and scatter chocolate shavings on top if you are feeling festive.
- Chill patiently:
- Cover the dish and refrigerate for at least three hours so every layer sets firmly and slices beautifully.
 Save to Pinterest
 The night my niece stood on a stool at the counter and helped me drizzle the peanut butter on top, she declared it looked like a painting, and now every family gathering requires this dessert as her personal contribution.
Making It Your Own
Scatter chopped roasted peanuts between the peanut butter and pudding layers if you want a surprise crunch that keeps every bite interesting.
Serving and Pairing
A tall glass of cold milk is the obvious companion, but a glass of sweet dessert wine turns this humble square into something unexpectedly elegant for a dinner party.
Storage and Leftovers
Cover the dish tightly and keep it refrigerated for up to four days, though in my experience it rarely lasts past day two.
- Freeze individual squares wrapped in plastic for up to a month and thaw them in the fridge overnight.
- Gluten free cookies swap in seamlessly for the crust if you need to accommodate dietary restrictions.
- Always double check pudding mix labels because some brands sneak in unexpected allergens.
 Save to Pinterest
 Some desserts are just dessert, and then some become the thing people request by name at every gathering, and this layered delight has earned that spot in my kitchen.
Recipe Questions & Answers
- → Can I make this dessert ahead of time?
-
Yes, this dessert is perfect for making ahead. You can prepare it up to 24 hours in advance and keep it refrigerated until ready to serve. The layers actually set better with longer chilling time.
- → Can I use natural peanut butter instead of creamy?
-
Regular creamy peanut butter works best for this dessert as it provides a smooth, stable texture. Natural peanut butter tends to separate and may make the layer too oily or loose. If using natural peanut butter, make sure to stir it thoroughly and consider adding a bit more powdered sugar to help stabilize the mixture.
- → How should I store leftovers?
-
Cover the baking dish tightly with plastic wrap or transfer individual squares to an airtight container. Store in the refrigerator for up to 3 days. The cookie crust may soften slightly over time but the dessert will remain delicious.
- → Can I freeze this layered dessert?
-
Yes, you can freeze individual squares wrapped tightly in plastic wrap and placed in a freezer-safe container for up to 1 month. Thaw in the refrigerator for several hours before serving. Note that the whipped topping texture may change slightly after freezing.
- → What can I substitute for whipped topping?
-
You can substitute an equal amount of homemade whipped cream. Whip 240 ml of heavy cream with 2 tablespoons of powdered sugar and 1 teaspoon of vanilla extract until stiff peaks form. This will give the dessert a richer, more homemade flavor.
- → How do I get clean slices when cutting?
-
Use a sharp knife and wipe it clean between each cut. Running the knife under hot water, then drying it before each slice can also help achieve cleaner edges. Chilling the dessert thoroughly before cutting is essential for neat layers.
