 Save to Pinterest
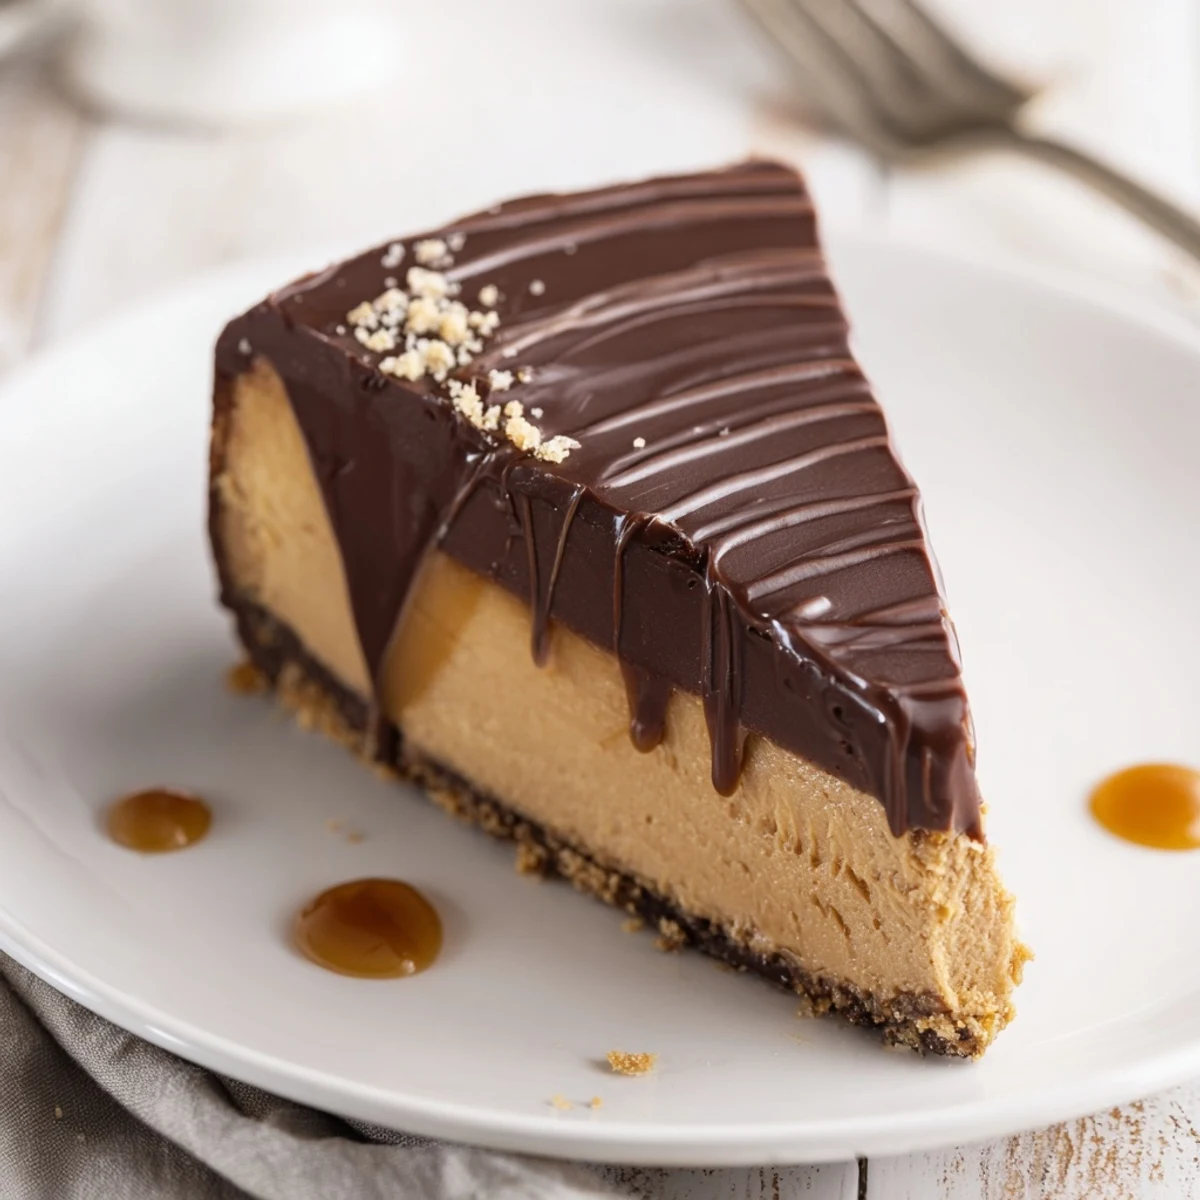
 This ultra-indulgent cheesecake layers a crunchy digestive biscuit base with a thick, silky caramel, a smooth cream cheese filling folded with whipped double cream, and a glossy dark chocolate ganache. Prepare and chill the base, cook the caramel until golden and spread it to set, then assemble the chilled filling and chill for several hours before pouring warm ganache. Chill to firm up and slice with a hot knife for neat, clean layers.
Some desserts feel more like an event than just a sweet treat, and this Millionaire Cheesecake is definitely in that category. The first time I put it together, the aroma of bubbling caramel and melting chocolate filled the kitchen so completely, I didn’t even notice my phone buzzing across the counter. Layering that thick, luscious caramel over a crisp biscuit base made me realize how much fun it is when baking borders on playful engineering. There’s calm satisfaction in smoothing the cheesecake batter and then pouring on a glossy ganache—so don’t rush these moments.
One weekend, I made this cheesecake for what started as a casual dinner with friends–it ended up stealing the spotlight, with everyone hovering in the kitchen, debating whether to wait for coffee or just eat it right away. I’ll never forget the sound of forks clinking against plates as each glossy slice disappeared. The only moment quieter was when that very first bite confirmed we’d unlocked a new celebratory favorite. To this day, my friend Tom still texts me the words 'Millionaire’s slice?' whenever he wants a gathering.
Ingredients
- Digestive biscuits or graham crackers: These form the sturdy base, and blitzing them into fine crumbs makes all the difference for an even, compact layer.
- Unsalted butter: Melted butter binds the base and also creates that rich, golden caramel—don’t rush the melting step for the best texture.
- Light brown sugar: Adds warmth and depth to both the biscuit base and caramel, rounding out the sweetness.
- Sweetened condensed milk: This is the magic behind that thick, gooey caramel; stir constantly to avoid burning.
- Golden syrup: A British staple, its gentle sweetness makes the caramel supple instead of sticky; if you can’t find any, light corn syrup works in a pinch.
- Sea salt: Optional, but a pinch or two truly elevates and balances the caramel’s sweetness.
- Full-fat cream cheese: Softened cream cheese whips into a silky, luxurious filling—skip the low-fat version for best results.
- Caster sugar: Fine sugar dissolves quickly in the filling, so you avoid graininess.
- Double cream (heavy cream): A quick whip gives the filling body and a cloud-like texture; don’t over-whip or it’ll go stiff.
- Vanilla extract: Just a teaspoon polishes off the flavor of the filling—real extract preferred over essence.
- Dark chocolate (at least 55% cocoa): For a ganache with depth and shine—chop it small for a smooth melt.
Instructions
- Bake the Biscuit Base:
- Crush the biscuits into fine crumbs—either the satisfying way with a rolling pin or a quick zip in a food processor. Combine crumbs with melted butter and brown sugar, then press firmly into the lined springform tin and chill while you work on the caramel.
- Stir Up the Caramel:
- Slowly melt butter, sugar, and golden syrup in a saucepan until bubbling gently. Pour in the sweetened condensed milk, then stand and stir steadily over medium heat until the caramel darkens and thickens, filling the kitchen with that unmistakable aroma—pour over the chilled base, then refrigerate to set.
- Mix the Cheesecake Layer:
- In a big bowl, beat softened cream cheese and caster sugar until absolutely smooth, then fold in the lightly whipped cream and vanilla. Smooth this dreamy mixture over the cooled caramel, taking a moment to enjoy the marbled surface before you chill it completely.
- Make the Chocolate Ganache:
- Heat double cream until steaming, then pour over chopped chocolate and let it sit for two minutes—don’t peek. Add butter, then stir in slow, patient circles until glossy, pour gently over the cheesecake, and tilt for even coverage before the final chill.
- Slice and Serve:
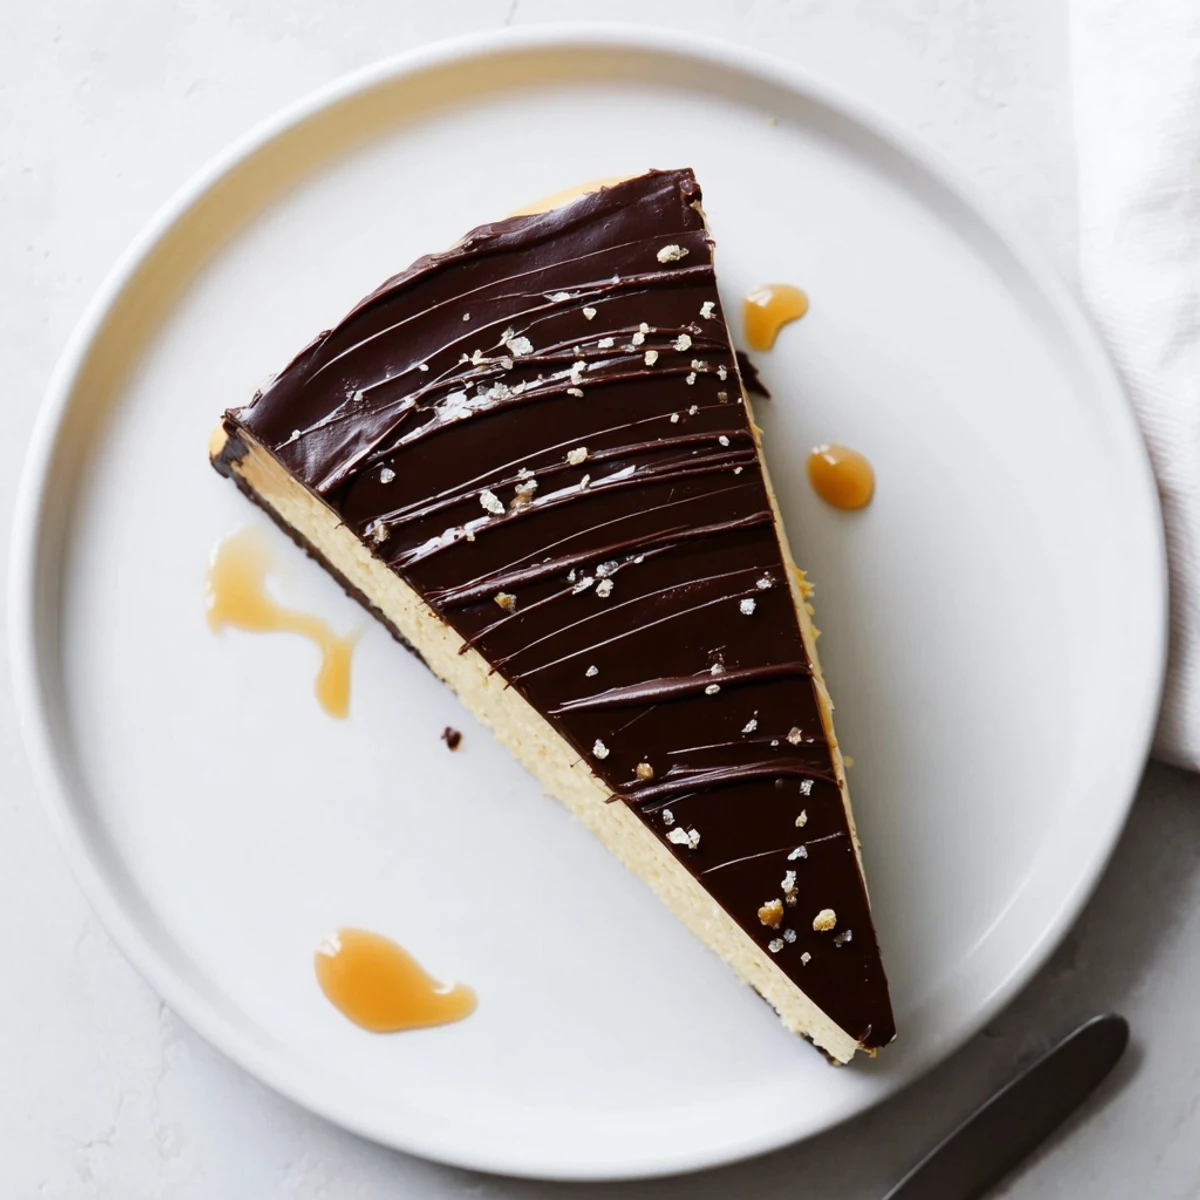
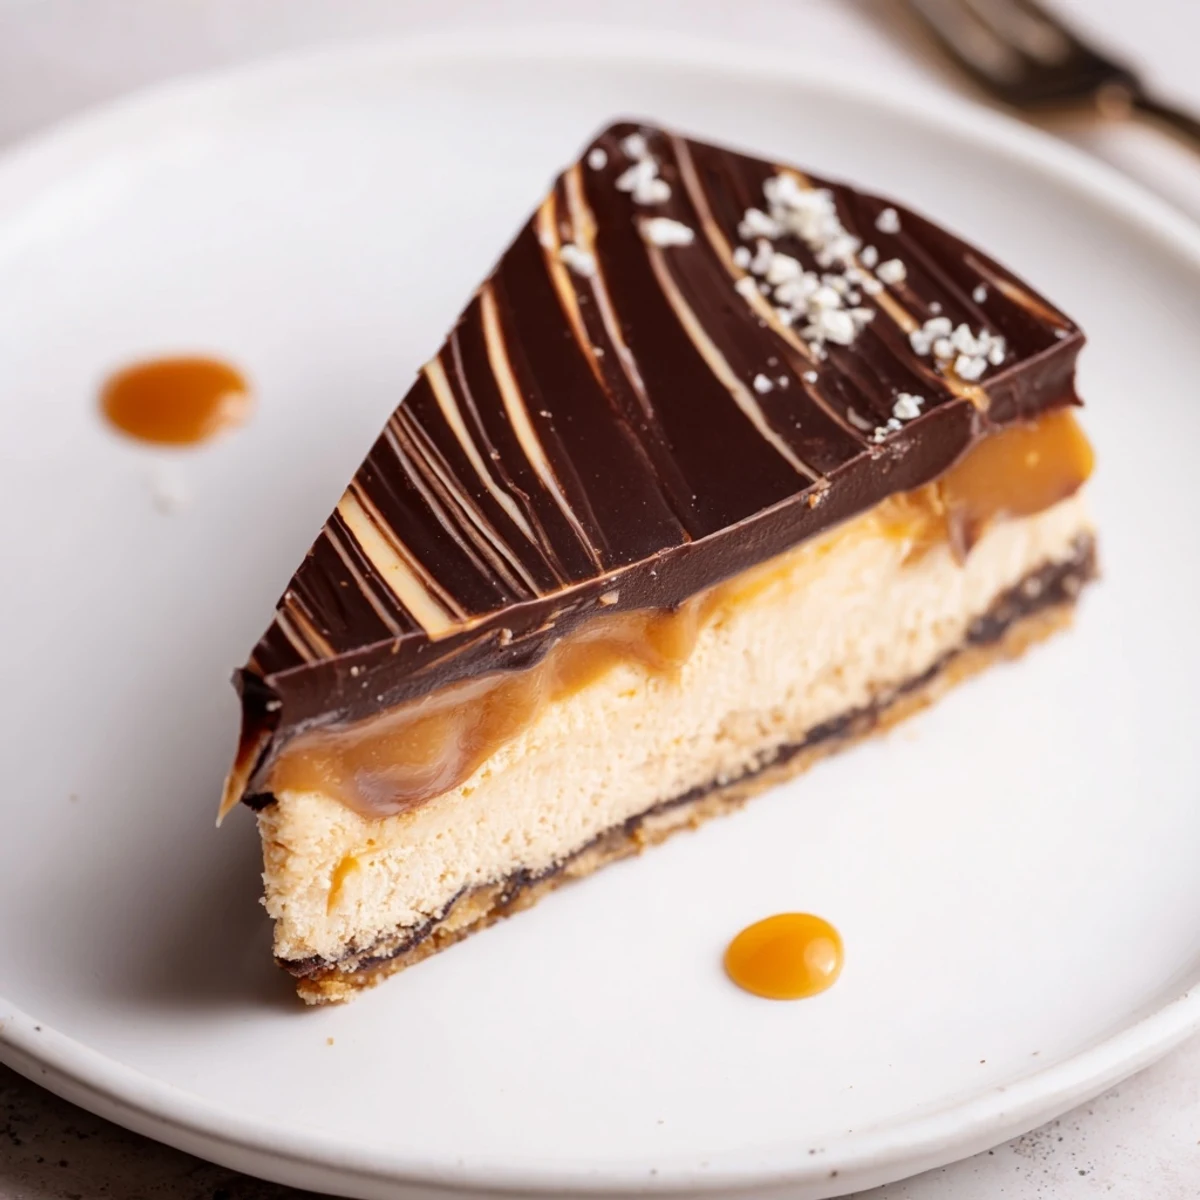
- Run a hot knife around the tin for a tidy release, then slice each serving with a warm blade for crisp, perfect layers. Stand back as everyone admires that picture-perfect cross-section before diving in.
 Save to Pinterest
 The day I brought this to my office for a birthday, even our usually no-nonsense manager went for seconds—she admitted later it was her first time tasting real homemade caramel. That moment—the chorus of surprised, delighted compliments—reminds me why it’s worth spending an afternoon on a decadent bake every now and then.
The Secret of Layering Like a Pro
One lesson I learned the hard way: let the caramel come all the way to room temperature before adding the cheesecake layer, no matter how impatient you feel. Warm caramel can melt your creamy filling, so I now use waiting time to wash up and read a few pages of a novel. It means every slice later is gorgeous and clean, not smeared or sunken.
Choosing Your Chocolate Wisely
I experimented with a few chocolate blends, and discovered that a touch of milk chocolate makes the ganache silkier but less intense, while all dark brings rich drama to every bite. If you like a sweeter finish, go half and half. Always chop the chocolate finely so it melts evenly and doesn’t leave streaks.
Effort-Saving Shortcuts That Really Work
Don’t be afraid to use a food processor for the base, and an electric mixer for the filling—save your hands for swirling ganache instead. Parchment paper helps lift the cheesecake cleanly from the tin, especially if you’re aiming for that wow-factor reveal. If the ganache seizes slightly, a splash more warm cream can rescue it every time.
- Put the tin on a baking sheet to catch any stray drips.
- Keep a mug of very hot water for your knife to slice tidy servings.
- Remember, each layer needs time—plan ahead for best texture.
 Save to Pinterest
 Whenever you need to wow a crowd or just want something absurdly indulgent, this Millionaire Cheesecake steps up. Share it, savor it, and let it become your new legend.
Recipe Questions & Answers
- → How can I prevent the caramel from separating or burning?
-
Cook the caramel over medium heat, stirring constantly to avoid scorching. Use a heavy‑bottomed saucepan, keep the heat steady, and remove from the heat once it thickens and turns golden. Adding butter and a splash of golden syrup helps with a smooth, glossy finish.
- → Can I make the base gluten-free?
-
Yes — swap digestive biscuits or graham crackers for a certified gluten-free crumb. Press the crumbs firmly into the tin and chill well to ensure a stable foundation for the caramel and filling.
- → How long should the layers chill between steps?
-
Chill the pressed base for about 20 minutes, set the caramel in the fridge for at least 1 hour, and chill the assembled cream cheese layer for 4–5 hours (overnight is best). After pouring ganache, chill 1–2 hours to fully set before serving.
- → What’s the best method for a smooth, glossy ganache?
-
Heat the cream until steaming, pour over finely chopped dark chocolate and let sit for 2 minutes. Stir gently from the center until smooth, then add a knob of butter for shine. Cool slightly before pouring so it sits neatly on the chilled filling.
- → Can this be prepared ahead of time and how should it be stored?
-
Yes — it keeps well in the fridge for 2–3 days in an airtight container. For longer storage, freeze slices wrapped tightly; thaw in the refrigerator before serving. Avoid long periods at room temperature to maintain texture.
- → How do I achieve clean, even slices?
-
Run a sharp knife under hot water, dry it, and slice with steady pressure, wiping the blade between cuts. A well-chilled cake and a warmed knife give the cleanest layers and prevent dragging the ganache.
