 Save to Pinterest
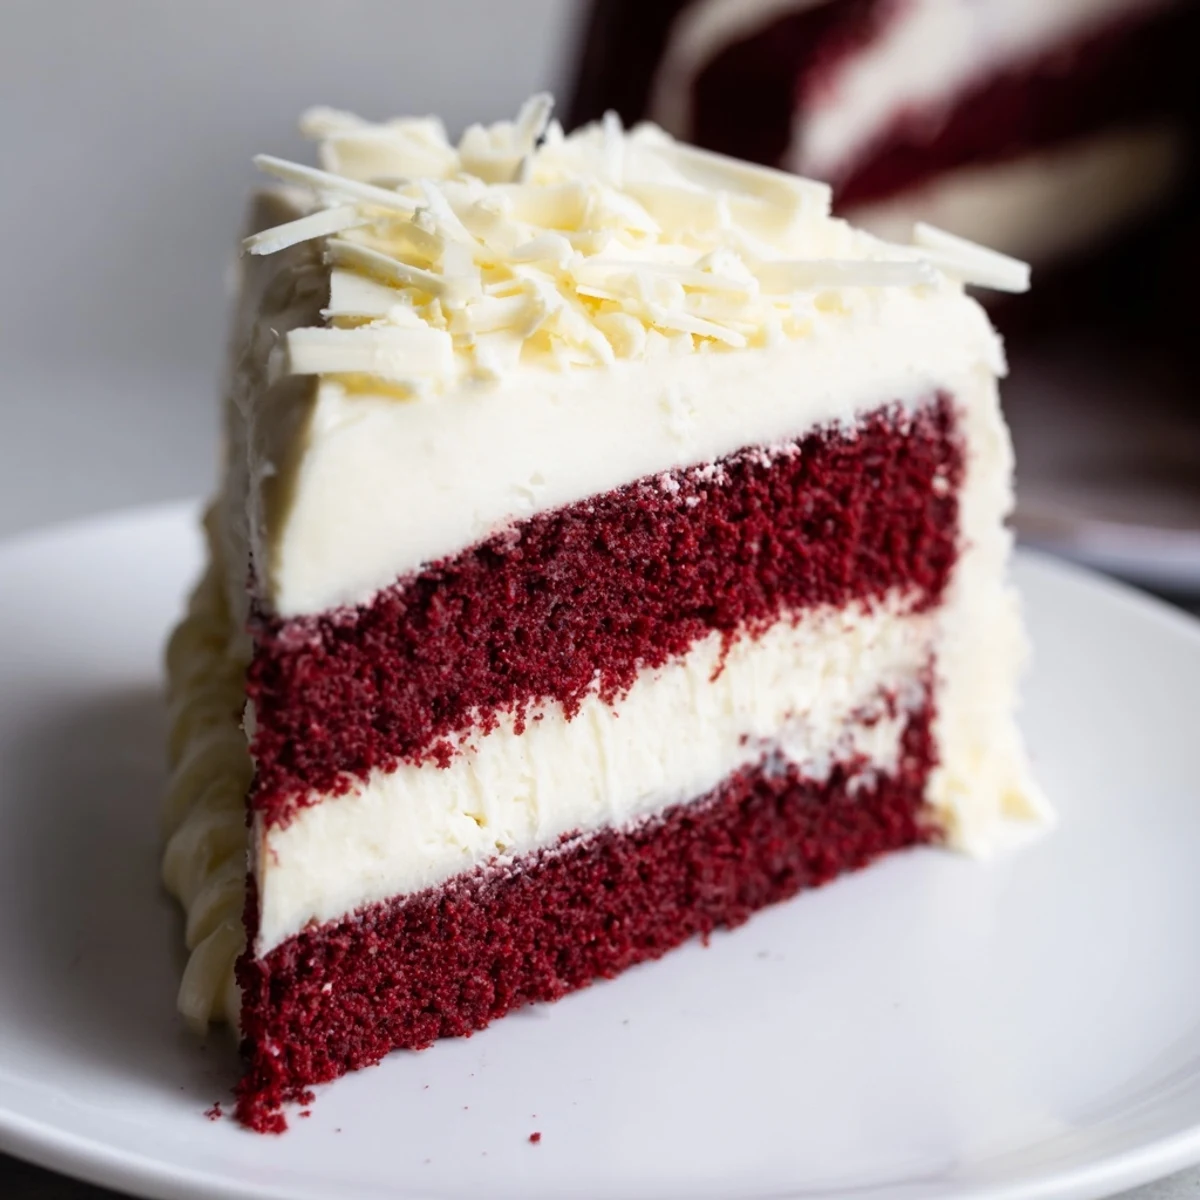
 This decadent dessert features a rich red velvet layer combined with a smooth, creamy cheesecake layer, baked to perfection and chilled for optimal texture. The process begins by preparing a moist red velvet base infused with cocoa and buttermilk, followed by creating a velvety filling with cream cheese, eggs, and sour cream. After baking and cooling, an optional cream cheese frosting adds a silky finish. Ideal for celebrations, this treat promises a balance of flavor and elegance.
The kitchen counter looked like a crime scene that Valentine's Day. Red food coloring everywhere. My roommate walked in, eyes wide, asking if I was okay. I just grinned and pointed at the most gorgeous two-toned beauty cooling on the rack.
Made this for my sister's engagement party last spring. She's not even a dessert person, but she texted me at midnight that night saying she couldn't stop thinking about that slice. Been her requested birthday cake ever since.
Ingredients
- All-purpose flour: The backbone of both layers. I sift it twice to prevent any stubborn lumps in the velvet cake.
- Granulated sugar: Divided between the cake and cheesecake layers. It balances that slight tang from the cream cheese perfectly.
- Vegetable oil: Keeps the red velvet layer incredibly moist. Butter would make it too dense for this delicate fusion.
- Buttermilk: Room temperature is non-negotiable here. It activates the baking soda and gives the cake its signature tender crumb.
- Large egg: Also room temperature. Cold eggs can seize up the batter and create those weird little eggy pockets.
- Unsweetened cocoa powder: Just enough to deepen the flavor without overpowering that classic red velvet taste.
- Baking soda: Works with the buttermilk to give the cake layer its lift.
- White vinegar: Another secret to that velvety texture. It might seem odd but trust the chemistry.
- Vanilla extract: Splurge on the good stuff. You'll taste the difference in both layers.
- Salt: A tiny pinch that makes all the flavors pop like they should.
- Red food coloring: Gel coloring gives you that rich crimson without adding too much liquid.
- Cream cheese: The star of the show. Let it soften completely or you'll end up with lumpy cheesecake.
- Sour cream: Adds that perfect tang and keeps the cheesecake layer silky smooth.
- Powdered sugar: For the frosting. Sifting it first is the difference between creamy and grainy.
- Unsalted butter: Room temperature for the frosting. You can't beat it into submission if it's cold.
Instructions
- Get your oven and pan ready:
- Preheat to 325°F and grease that springform pan like your life depends on it. Line the bottom with parchment or you will regret it later.
- Whisk the dry ingredients:
- Flour, cocoa, baking soda, and salt in one bowl. Give it a quick whisk to aerate everything.
- Beat the wet mixture:
- Sugar, oil, and egg until it looks lighter and fluffier. Then buttermilk, vinegar, vanilla, and that shocking amount of red food coloring.
- Combine and spread:
- Fold the dry into the wet gently. Pour into your prepared pan and spread it to the edges.
- Partial bake the cake layer:
- Fifteen minutes only. The center might still look a little jiggly and that is exactly what you want.
- Make the cheesecake batter:
- Beat cream cheese and sugar until you cannot feel any grit. Add eggs one at a time and beat until smooth.
- Finish the cheesecake mixture:
- Sour cream, vanilla, and flour. Just until combined. Overmixing now means cracks later.
- Layer and bake:
- Pour the cheesecake batter right over that partially baked cake. Smooth the top and bake for about an hour.
- The cooling trick:
- Turn off the oven, crack the door, and let it cool inside for an hour. This prevents the dreaded cheesecake crack.
- Chill completely:
- Room temperature first, then at least six hours in the fridge. Overnight is even better.
- Frosting time:
- Beat cream cheese and butter until fluffy. Add powdered sugar and vanilla. Spread over your completely chilled masterpiece.
 Save to Pinterest
 My aunt still talks about the time I brought this to Thanksgiving dessert. She's not big on sweets but she went back for seconds. Now it's her requested contribution for every family gathering. I just show up with the cake and let her take all the credit.
Making It Ahead
This cheesecake actually gets better after a day in the fridge. The flavors meld together and the texture firms up perfectly. I make it the day before serving and frost it right before guests arrive. Less stress, better dessert.
Serving Suggestions
A sharp knife dipped in hot water between slices makes the cleanest cuts. I serve it slightly chilled but not ice cold. That 20 minute sit on the counter before serving lets the cream cheese frosting soften just enough.
Storage and Leftovers
Keep it covered in the fridge and it will last five days easily. The cake layer might soften slightly but the flavor stays incredible. I have never actually had leftovers last longer than two days.
- Freeze individual slices wrapped tightly in plastic for up to a month.
- Thaw in the fridge overnight for the best texture.
- Add fresh berries right before serving for a pop of color and freshness.
 Save to Pinterest
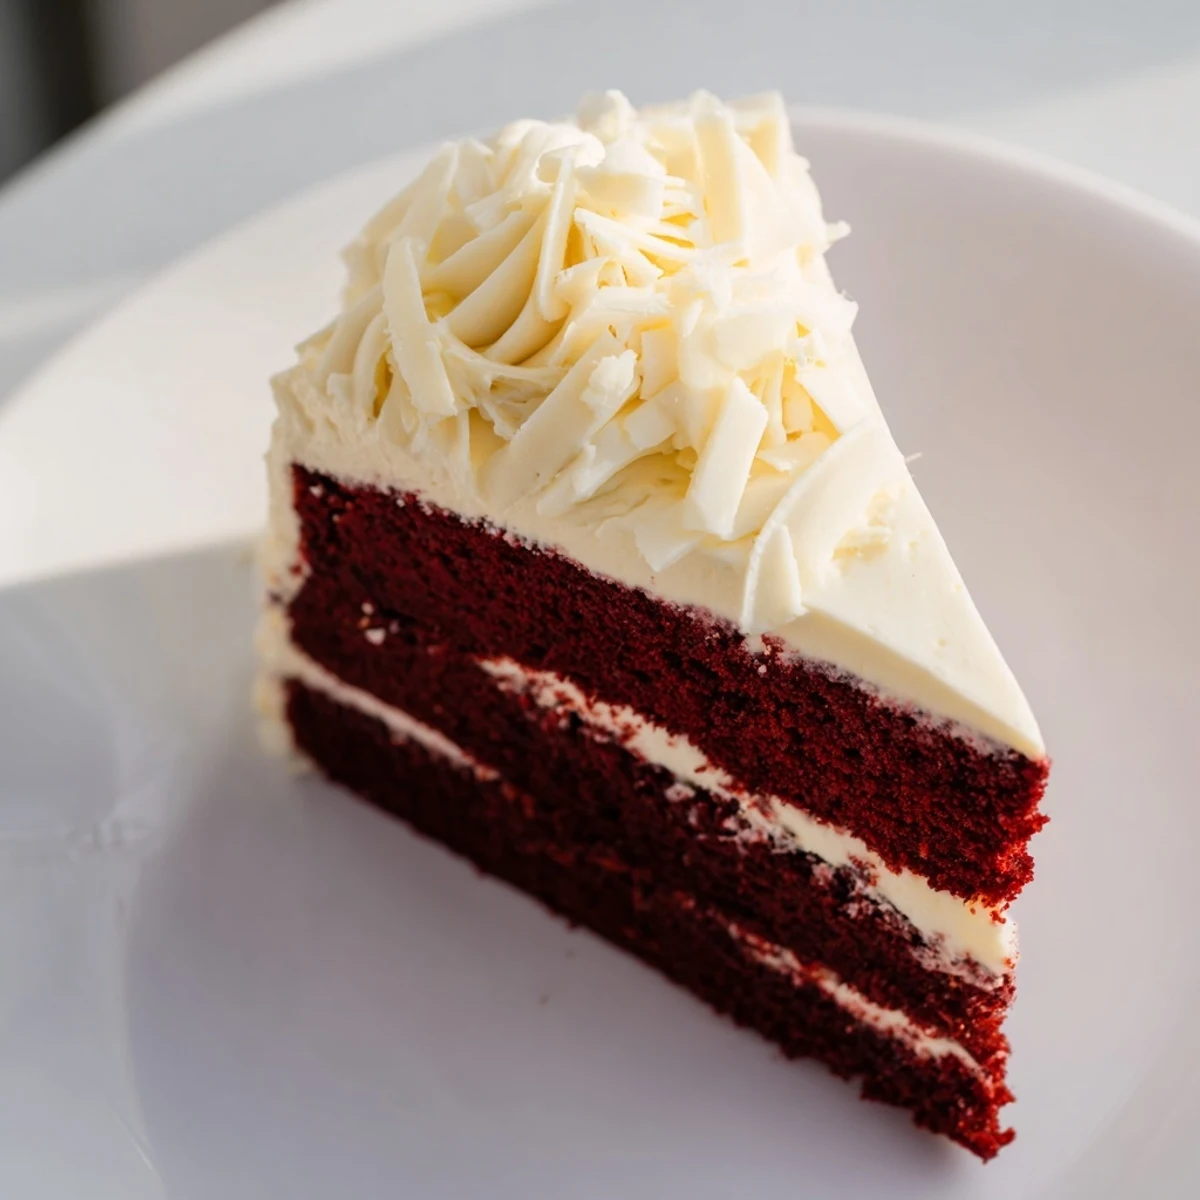
 There is something genuinely satisfying about cutting into that red and white marbled beauty. Watch people's faces when they take that first bite.
Recipe Questions & Answers
- → How do I achieve the vibrant red color in the velvet layer?
-
Use gel-based red food coloring to ensure a bright and consistent hue without affecting batter consistency.
- → Can I prepare this dessert in advance?
-
Yes, it benefits from chilling overnight to set fully and enhance flavors.
- → Is it necessary to bake the velvet layer before adding the creamy layer?
-
Partially baking the velvet base ensures the layers set distinctly while blending flavors.
- → What are good decoration ideas for this dessert?
-
White chocolate shavings, fresh berries, or a dusting of cocoa powder complement the flavors beautifully.
- → Can this be made vegetarian-friendly?
-
Yes, it uses vegetarian ingredients, but verify that gelatin-based colorings or additives are avoided.
