 Save to Pinterest
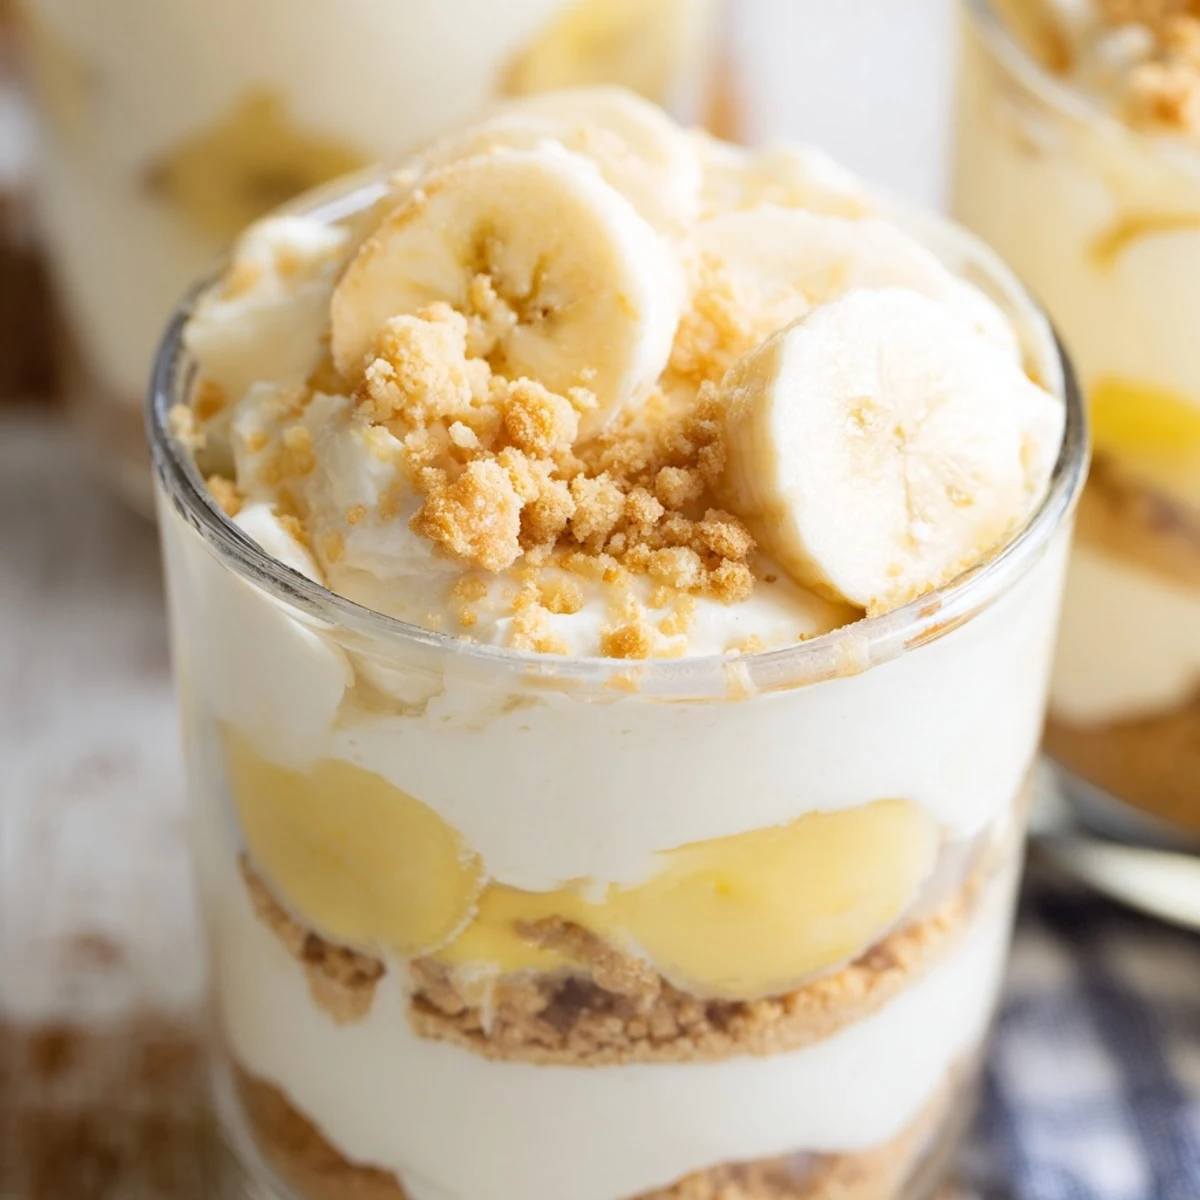
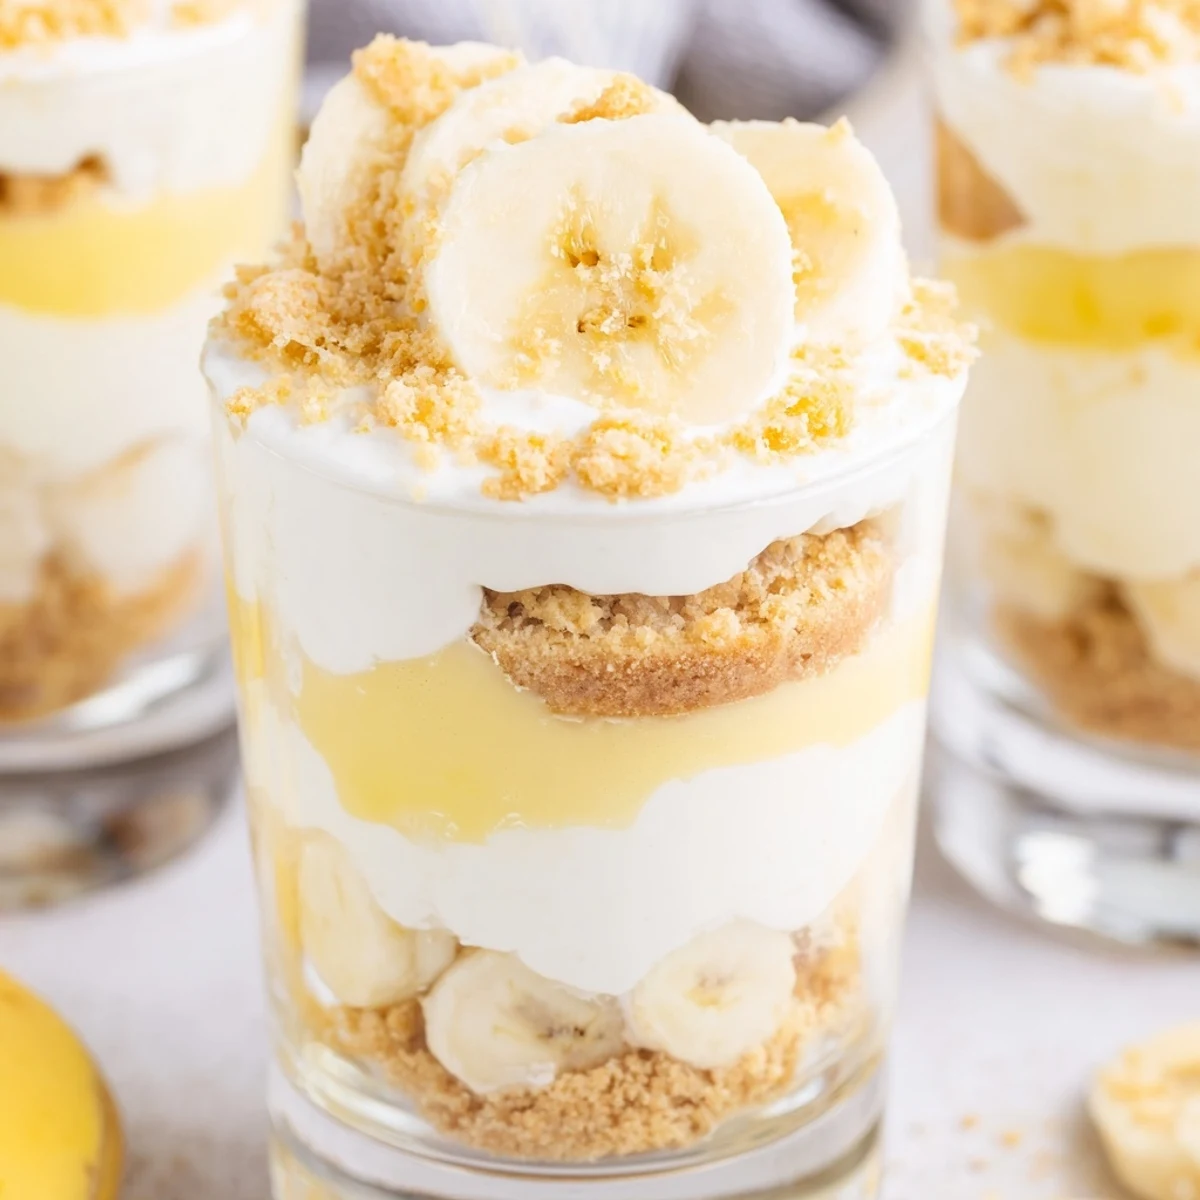
 These individual cups feature velvety layers of vanilla-infused cheesecake filling and classic banana pudding, all nestled atop a buttery vanilla wafer crust. The no-bake preparation comes together in just 20 minutes, requiring only a brief chill to set. Fresh banana slices add natural sweetness throughout, while a final dusting of crispy wafer crumbs provides delightful textural contrast. Perfect for entertaining or effortless weeknight desserts, these portable treats offer all the indulgence of traditional banana cream pie with the added richness of cream cheese.
The rain was pounding against my kitchen window last Sunday when I decided we needed something comforting but not heavy. These little cups came together in this wonderful rhythm—crush, whip, layer, repeat. My partner wandered in midway through, drawn by the sound of the mixer against the bowl, and ended up stealing spoonfuls of the cheesecake filling every time I turned my back. That's the thing about no-bake desserts; they invite this kind of casual kitchen presence.
I first made these for a summer potluck when the host's oven mysteriously stopped working. People kept asking where I'd found the recipe, but honestly, it was one of those happy accidents born from necessity. Now they're my go-to when I want to bring something that looks impressive but lets me actually enjoy the party instead of stressing in the kitchen.
Ingredients
- Vanilla wafer cookies (1 cup, crushed): The classic Nilla wafers work beautifully here, and crushing them by hand in a sealed bag is oddly therapeutic
- Unsalted butter (2 tbsp, melted): Let this cool slightly after melting so it doesn't make your crumbs too soft when mixing
- Cream cheese (8 oz, softened): Room temperature is non-negotiable here—cold cream cheese leaves you with tiny lumps that won't smooth out
- Granulated sugar (1/3 cup): This amount hits the sweet spot without overpowering the banana flavor
- Pure vanilla extract (1 tsp): The real stuff matters when vanilla is one of the primary flavors shining through
- Heavy whipping cream (1 cup, cold): I pop my bowl and whisk in the freezer for 10 minutes first—it makes whipping faster and the peaks more stable
- Instant banana pudding mix (3.4 oz): Don't overthink the brand, but do stick to instant rather than cook-and-serve
- Cold whole milk (1 1/4 cups): The temperature matters for proper pudding thickening
- Ripe bananas (2, sliced): Look for bananas with some brown spots—they're sweeter and mash better if you decide to fold some into the pudding
Instructions
- Build the buttery crust foundation:
- Toss your crushed wafers with melted butter until every piece feels lightly coated, then press about two tablespoons into the bottom of each cup with the back of a spoon—firm enough to hold together but not so hard that it becomes a solid brick.
- Create the silky cheesecake base:
- Beat that softened cream cheese with sugar and vanilla until it's completely smooth, then whip your cold cream in a separate chilled bowl until you can lift the whisk and the peaks stand proud without collapsing.
- Gently marry the two mixtures:
- Fold the whipped cream into the cream cheese mixture in three additions, using a spatula to scoop from the bottom and fold over the top—this keeps all that air you just whipped into the cream.
- Whisk up the banana pudding:
- Combine the pudding mix with cold milk and whisk for exactly two minutes by the clock; set it aside and it'll thicken beautifully while you prep everything else.
- Layer your flavors with intention:
- Spoon half the cheesecake mixture over your crusts, add a layer of fresh banana slices, then divide the pudding between cups, and crown each one with the remaining cheesecake filling.
- Add the finishing touches:
- Scatter extra wafer crumbs on top, arrange fresh banana slices in whatever pattern makes you happy, and add a little whipped cream cloud if you're feeling fancy.
- Exercise patience (the hardest step):
- Cover your cups and let them chill for at least two hours—the flavors need this time to become friends and the textures to settle into something cohesive rather than separate layers.
 Save to Pinterest
 My niece helped me make these last Thanksgiving and she took such pride in carefully arranging the banana slices on top. Later, I found her showing her handiwork to everyone who walked into the kitchen, beaming like she'd invented dessert itself. That's what I love about individual servings—they make everyone feel like they've received something special, made just for them.
Make-Ahead Magic
The best thing about this recipe is how well it plays with your schedule. You can make everything a day in advance and keep it covered in the fridge, letting the flavors meld even more deeply. I've even made the components separately and assembled them at a friend's house—just keep the cheesecake mixture cold and don't add the final banana layer until you're ready to serve.
Serving Suggestions
Clear glass cups or jars show off those beautiful layers, but honestly, any small vessel will work. I've used mason jars, wine glasses, and even tea cups for a shower. The key is choosing something with straight-ish sides so you get distinct layers rather than everything blending together into a muddy gradient.
Customization Ideas
Sometimes I'll add a teaspoon of cinnamon to the crust mixture for warmth, especially in colder months. A splash of dark rum in the cheesecake layer makes it feel more grown-up for dinner parties. And if you want to get fancy, try caramelizing some banana slices in a skillet with brown sugar before using them as a garnish—the slight bitterness balances the sweet cream beautifully.
- Try swapping vanilla wafers for graham crackers or even Biscoff cookies for a different flavor profile
- A pinch of sea salt on top right before serving makes all the flavors pop
- If you're feeling indulgent, drizzle with warm salted caramel just before serving
 Save to Pinterest
 There's something so satisfying about serving a dessert that looks like you fussed for hours but actually came together with a mixer and twenty minutes. These cups have become my secret weapon for moments when I want to show love through food but still have energy left to enjoy the people I'm feeding.
Recipe Questions & Answers
- → Can I make these ahead of time?
-
Yes, prepare up to 24 hours in advance. Store covered in the refrigerator and add fresh banana slices and wafer crumbs just before serving to maintain optimal texture and appearance.
- → What type of cups work best for serving?
-
Clear glass dessert cups, mason jars, or small parfait glasses allow the beautiful layers to show through. Any 6-8 ounce vessel with straight sides works perfectly for assembly and presentation.
- → How do I prevent the bananas from turning brown?
-
Toss sliced bananas lightly in lemon juice before layering, or add them immediately before serving. The acidic coating helps slow oxidation while maintaining the fresh banana flavor.
- → Can I use homemade vanilla wafers instead of store-bought?
-
Absolutely. Homemade vanilla wafers or even graham crackers work beautifully for the crust. Just ensure they're crushed finely and mixed thoroughly with melted butter for proper texture.
- → What if I don't have a hand mixer?
-
A whisk and some elbow grease work for the cream cheese mixture. For the whipped cream, a stand mixer or even a jar-shaking method can achieve stiff peaks, though a hand mixer makes the process significantly faster.
- → Can I substitute the instant pudding mix?
-
For a scratch version, cook a traditional custard with egg yolks, sugar, cornstarch, and mashed bananas. Cool completely before layering, though this will increase preparation time significantly.
